
Table of Contents
- Why Outdoor Lighting Needs a Plan
- Start With a Nighttime Walk Around the Property
- Divide the Property Into Lighting Zones
- Match Fixtures to the Task
- Control Brightness, Glare, and Shadows
- Use Efficient Fixtures and Smart Controls
- Practice Responsible Outdoor Lighting
- Avoid Common Outdoor Lighting Mistakes
- Plan for Installation and Maintenance
- Common Questions About Outdoor Lighting
- Final Thoughts
Outdoor lighting should do more than make a home visible after sunset. A thoughtful plan can make arrivals easier, improve footing on paths and stairs, and create comfortable areas for relaxing outside. Before choosing fixtures, it helps to understand how exterior lighting can support visibility, comfort, and appearance without turning the yard into an overly bright space.
The most successful layouts are intentional. Instead of adding lights wherever an outlet is available, consider how people use the property at night, where hazards exist, and which features actually deserve attention. Brightness alone is not the goal. Even well-aimed light is usually more useful than a few intense fixtures that create glare and deep shadows.
Why Outdoor Lighting Needs a Plan
Randomly placed fixtures often leave important areas dark while concentrating too much light in one spot. A plan helps prioritize routes to doors, driveway transitions, outdoor living areas, and difficult corners. It also makes it easier to select fixtures based on what they need to accomplish, rather than choosing every light by style alone.
Planning does not require a complicated drawing or a complete renovation. A simple sketch, a list of nighttime activities, and a few observations from outdoors can reveal the best starting points. For small repairs, mounting needs, and other household projects that fall outside major electrical work, a local handyman may be able to help address practical preparation tasks.
Start With a Nighttime Walk Around the Property
Walk the property after dark before buying anything. Bring a flashlight, but keep it off while observing normal conditions. Notice where it is hard to judge depth, find a door lock, see changes in pavement, or move comfortably from the driveway to the house.
What to Look For
- Steps, slopes, curbs, uneven paving, and retaining-wall edges.
- Front walks, side gates, rear entrances, and garage access points.
- Patios, decks, grills, dining spaces, and seating areas.
- Dark corners near detached structures, trash areas, or fences.
- Light spilling into bedroom windows, neighboring yards, or a visitor’s line of sight.
Divide the Property Into Lighting Zones
Breaking the yard into zones prevents over-lighting and gives each fixture a clear purpose. Mark the areas on a sketch, then write down the job each light should perform.
- Arrival zone: Driveway, front walk, porch, and entry door.
- Movement zone: Paths, stairs, side yards, and gates.
- Living zone: Patios, porches, decks, and dining areas.
- Security zone: Service entrances, garages, and poorly visible corners.
- Feature zone: Trees, stonework, garden beds, and architectural details.
Match Fixtures to the Task
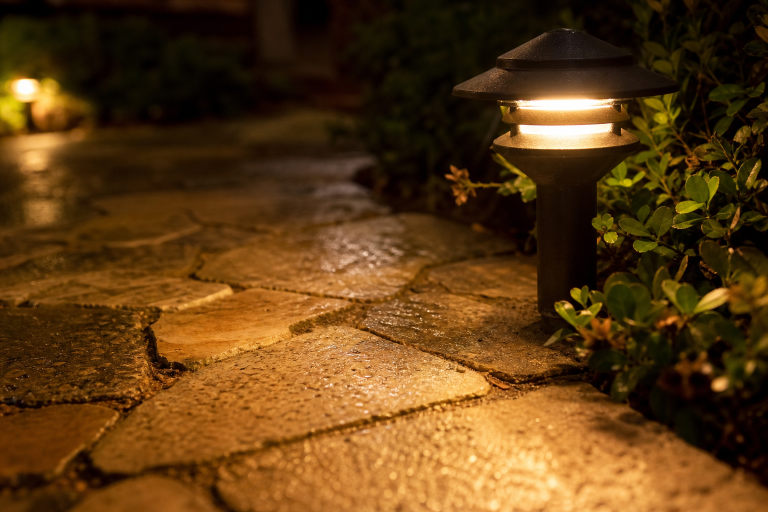
Each fixture type produces a different pattern of light. Path lights can guide movement along a walkway, while step lights provide focused visibility at changes in elevation. Wall-mounted fixtures work well beside doors and garages, and downlights mounted above eye level can create a softer, more natural effect.
Spotlights are best reserved for a focal point such as a mature tree, column, or textured wall. Floodlights cover larger areas but need careful aiming because broad, exposed beams can create glare. Decorative string lights can add atmosphere above a patio, but they should not be treated as the primary safety lighting for stairs or walkways.
Control Brightness, Glare, and Shadows
More light does not always mean better visibility. When a bulb shines directly into someone’s eyes, the surrounding area can appear darker by comparison. Aim fixtures downward or toward the intended surface, and choose shielded, hooded, or recessed designs when the light source would otherwise be visible.
Use overlapping pools of gentle light along walking routes instead of relying on one powerful fixture at either end. Test the layout from the porch, driveway, sidewalk, and inside the home. A good setup should help people see where they are going without creating harsh reflections in windows or bright hot spots on pavement.
Use Efficient Fixtures and Smart Controls
LED fixtures are a practical choice for many outdoor applications because they can provide useful light with lower energy use and work with a range of controls. Timers can handle predictable evening schedules, photocells can respond to dusk and dawn, and motion sensors can limit operation in low-traffic areas.
Separate controls for arrival, living, and security zones provide more flexibility than placing every outdoor fixture on one switch. Dimmers are particularly helpful around patios and porches, where brighter light may be useful for a task, but a lower setting is more comfortable for conversation. The balance between nighttime visibility and unnecessary light matters because efficient fixtures can still waste energy when they are misdirected or left on longer than needed.
Practice Responsible Outdoor Lighting
Responsible lighting means using light only where it has a clear purpose, directing it toward the target, and selecting the lowest effective brightness. Warmer color temperatures may also create a calmer residential setting, particularly in gardens, patios, and neighborhoods with limited ambient light.
Shielding is one of the simplest improvements a homeowner can make. Guidance for reducing wasted light around a home emphasizes keeping illumination on the ground and away from the sky, windows, and neighboring properties. Timers, dimmers, and sensors further reduce unnecessary nighttime output.
Avoid Common Outdoor Lighting Mistakes
- Using too many fixtures: Excessive lighting can make landscaping look crowded and harsh.
- Ignoring glare: Unshielded bulbs can reduce comfort and make shadows seem deeper.
- Creating a runway effect: Perfectly matched lights on both sides of every path can feel stiff and overly formal.
- Lighting only the front yard: Side entrances, stairs, and rear gathering spaces deserve equal consideration.
- Skipping nighttime testing: Fixture spacing and aiming should be checked after dark, before installation is finalized.
Plan for Installation and Maintenance
Projects involving new circuits, buried wiring, electrical-panel changes, water features, or recurring faults should be handled by a qualified electrical professional. Once the system is installed, regular upkeep helps maintain the original design.
- Clean lenses and fixture housings.
- Trim plants that block or distort beams.
- Check fixtures and exposed cables after storms or yard work.
- Adjust timers as seasonal daylight hours change.
- Replace failed fixtures before they create dark safety gaps.
Common Questions About Outdoor Lighting
How bright should outdoor lights be?
Brightness depends on the task, fixture location, surrounding darkness, and the surface being illuminated. Steps and entries need clear visibility, while landscape accents and entertaining spaces often benefit from a softer glow.
Are motion sensors better than timers?
Neither is universally better. Timers provide predictable operation, while motion sensors reduce runtime in areas that are only occasionally used. Many homes benefit from using both.
Can outdoor lighting improve security?
Lighting can improve visibility around doors, paths, and activity areas, but excessive brightness can produce glare and concealment shadows. Careful placement is more effective than simply installing the strongest available fixture.
Final Thoughts
A well-planned outdoor lighting system begins with real nighttime needs. Prioritize safe routes, use fixtures that match each job, control glare, and add automation where it makes sense. A smaller system with deliberate placement can often feel safer, more comfortable, and more attractive than a brighter setup with no clear plan.